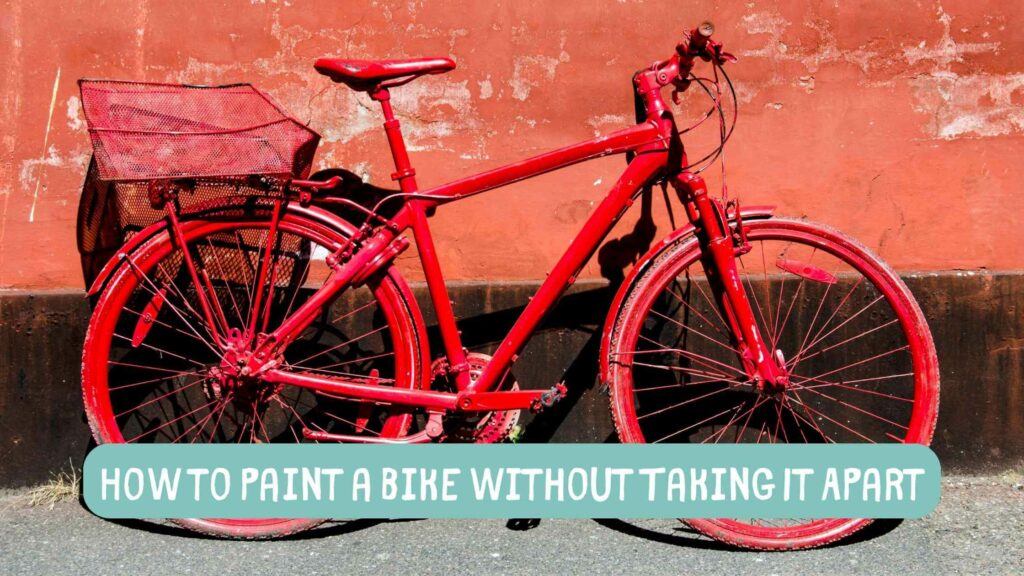
Painting a bike can be a fun and rewarding project, but the thought of disassembling the entire bike can be overwhelming. The good news is that you can paint your bike without taking it apart! With the right tools and techniques, you can give your bike a fresh new look without the hassle of removing every bolt and screw.
While painting a bike without taking it apart may seem daunting, it’s actually a fairly straightforward process. With a little bit of patience and attention to detail, you can achieve a professional-looking finish that will make your bike stand out from the crowd.
So, if you’re ready to give your bike a fresh new look, read on for our tips and tricks on how to paint a bike without taking it apart.
Key Takeaways:
- Painting Without Disassembly:
You can paint your bike without the need to fully disassemble it. Proper tools and techniques can help you achieve a fresh look without removing every part. - Preparation is Key:
Adequate preparation is crucial. Thoroughly clean the bike, mask off areas not to be painted, and sand surfaces to be painted. Applying a primer ensures proper paint adhesion. - Applying Paint:
Following preparation, apply the chosen paint in thin, even coats. Use circular motions and let each coat dry completely before applying another one. - Post-Painting Clear Coat:
Applying a clear coat after painting adds an extra layer of protection and gives the bike a glossy finish. Thin coats should be used and allowed to dry fully. - Choosing the Right Paint:
Selecting suitable paint is vital for a durable finish. Spray paint, especially enamel spray paint, is a good choice for its wide color range and scratch-resistant qualities. - Essential Tools:
The necessary tools include masking tape, sandpaper, sanding block, abrasive cleaner, degreaser, old clothes, face mask, N-95 mask, goggles, paint sprayer, and putty knife. - Post-Painting Care:
After painting, ensure the bike is completely dry before riding it. Applying a clear coat and taking precautions against scratches, such as using a protective film, can help maintain the paint job’s longevity.
Bike Painting Basics
Painting your bike can be a fun and rewarding experience. Not only does it give your bike a fresh new look, but it can also help protect it from the elements. Whether you’re looking to add a custom touch to your bike or simply want to freshen up its appearance, here are some basics to keep in mind when painting your bike.
Preparation
Before you start painting, it’s important to properly prepare your bike. This includes cleaning and sanding the surfaces to be painted, as well as covering any parts that you don’t want to paint. You’ll also need to choose the right type of paint for your bike, whether it’s spray paint or brush-on paint.
Painting
When it comes to actually painting your bike, it’s important to follow a few key steps. First, apply a primer to the surfaces to be painted. This will help the paint adhere better and provide a smoother finish. Once the primer has dried, apply your chosen paint in thin, even coats. Be sure to allow each coat to dry completely before applying the next one.
Tips and Tricks
Here are a few tips and tricks to keep in mind when painting your bike:
- Use high-quality paint and tools for the best results.
- Work in a well-ventilated area to avoid inhaling fumes.
- Consider using a bike stand or hanger to make painting easier.
- Apply a clear coat over your paint to help protect it from scratches and fading.
- Take your time and be patient – rushing the process can lead to mistakes and a less-than-perfect finish.
Choosing the Right Materials
When it comes to painting your bike without taking it apart, selecting the right materials is crucial for achieving a professional-looking finish. In this section, we will discuss the materials you will need to get started, including paint, primer, and tools.
Selecting the Paint
Choosing the right paint is essential for achieving a durable and long-lasting finish. Spray paint is an excellent option for painting a bike without taking it apart. You can choose from a wide range of colors and finishes, including matte, gloss, and metallic. Enamel spray paint is also an excellent option, as it dries to a hard, durable finish that is resistant to scratches and chips.
Choosing the Right Tools
In addition to paint, you will need several tools to get the job done right. Here are some of the essential tools you will need:
- Masking tape: Use masking tape to cover any areas of the bike that you don’t want to paint.
- Sandpaper: You will need high-grit sandpaper to sand down the parts of the bike you want to paint.
- Sanding block: A sanding block is a useful tool for sanding large areas of the bike.
- Abrasive cleaner: Use an abrasive cleaner to remove any dirt and grime from the bike before painting.
- Degreaser: Use a degreaser to remove any grease or oil from the bike before painting.
- Clothes: Wear old clothes that you don’t mind getting dirty.
- Face mask: Wear a face mask to protect yourself from inhaling paint fumes.
- N-95 mask: Use an N-95 mask to protect yourself from inhaling harmful particles.
- Goggles: Wear goggles to protect your eyes from paint splatters.
- Paint sprayer: A paint sprayer can make the job much easier and give you a more even finish.
- Putty knife: Use a putty knife to remove any old paint or rust from the bike.
Pro Tip:

When selecting your materials, make sure to choose high-quality products that are specifically designed for painting bikes. This will ensure that you achieve the best results possible.
Preparation Stage
Before you start painting your bike, you need to prepare it properly. This means cleaning, sanding, and masking the bike. By doing these tasks, you will ensure that the paint will adhere properly and that the finished product looks great.
Cleaning the Bike
The first step in preparing your bike for painting is to clean it thoroughly. You should use water and soap to remove any dirt, grease, or grime that has accumulated on the bike. You can also use a degreaser or abrasive cleaner to help remove stubborn stains. Make sure you rinse the bike thoroughly with clean water and let it dry completely before moving on to the next step.
Sanding the Bike
After cleaning the bike, you should sand it to remove any rust, scratches, or other imperfections. You can use sandpaper or a wire brush to do this. Be sure to sand the bike frame, headset, bearing surfaces, wires, brake posts, and any other areas that will be painted. Sanding the bike will help the paint adhere better and will also make the finished product look smoother.
Masking the Bike
Once you have sanded the bike, you need to mask off any areas that you don’t want to paint. This includes stickers, labels, and any other parts that you want to keep scratchproof. You can use masking tape, trash bags, or aluminum foil to cover these areas. Be sure to cover the bike hanger, bike mount, and any other parts that will be visible after painting.
Pro Tip:

Use rubbing alcohol to clean the areas you will mask off to ensure the tape sticks properly.
Painting Process
When it comes to painting your bike without taking it apart, the painting process can seem daunting. However, with the right techniques and tools, you can achieve a professional-looking paint job. In this section, we will outline the steps you need to follow to paint your bike without taking it apart.
Priming the Bike
Before you begin painting, you need to prime your bike. Priming helps the paint adhere to the bike surface and prevents rust. To prime your bike, follow these steps:
- Clean your bike thoroughly with soap and water and let it dry.
- Scuff up the surface of the bike with fine-grit sandpaper to help the primer adhere better.
- Apply a thin coat of primer to the bike in circular motions. Be sure to use thin coats to avoid air bubbles and overspray.
- Let the primer dry completely before moving on to the next step.
Applying the Base Coat
Once your bike is primed, it’s time to apply the base coat. The base coat is the color that will show through the final paint job. To apply the base coat, follow these steps:
- Shake the can of paint well before using it.
- Apply a thin coat of paint to the bike in circular motions. Be sure to use thin coats to avoid air bubbles and overspray.
- Let the paint dry completely before applying another coat. You may need to apply multiple coats to achieve the desired color.
Applying the Clear Coat
The final step in the painting process is to apply the clear coat. The clear coat adds a layer of protection to your paint job and gives it a glossy finish. To apply the clear coat, follow these steps:
- Shake the can of clear coat well before using it.
- Apply a thin coat of clear coat to the bike in circular motions. Be sure to use thin coats to avoid air bubbles and overspray.
- Let the clear coat dry completely before applying another coat. You may need to apply multiple coats to achieve the desired gloss.
Pro Tip:

When spray painting a bike, be sure to wear a mask to avoid inhaling fumes. Additionally, be sure to set up your work area in a well-ventilated area to avoid overspray.
Post-Painting Care
After you have finished painting your bike, it is important to take care of it properly to ensure that the paint job lasts as long as possible. Here are some tips for post-painting care:
Drying
First and foremost, make sure that the paint is completely dry before you ride your bike. This can take anywhere from a few hours to a few days, depending on the type of paint you used and the weather conditions. It is best to wait at least 24 hours before handling your bike or riding it.
Clear Coat
If you want to protect your paint job from scratches and other damage, it is a good idea to apply a clear coat. This will give your bike a glossy finish and help to prevent the paint from chipping or peeling. Make sure to apply the clear coat in a well-ventilated area and follow the manufacturer’s instructions carefully.
Scratchproof
While no paint job is completely scratchproof, there are some things you can do to minimize the risk of scratches. For example, avoid leaning your bike against rough surfaces or dragging it across the ground. You can also apply a protective film to high-risk areas like the chainstays and downtube.
Pro Tip:

To make your paint job last even longer, consider waxing your bike regularly. This will help to protect the paint from UV rays and other environmental factors. Just make sure to use a wax that is safe for painted surfaces and follow the instructions carefully.
FAQ: Paint a Bike Without Taking It Apart
What are some tips for painting a bike without disassembling it?
When painting a bike without disassembling it, there are a few tips you should keep in mind to ensure that you get the best results. First, make sure to thoroughly clean your bike before you begin painting. This will help the paint adhere better and last longer. Second, use a high-quality primer to create a smooth surface for the paint to adhere to. Third, apply thin coats of paint and allow each coat to dry completely before applying the next. Finally, be patient and take your time to ensure that the paint job looks professional.
Can I paint a bike without sanding it first?
While it is possible to paint a bike without sanding it first, it is not recommended. Sanding the bike before you paint it will help the paint adhere better and last longer. Sanding also helps to smooth out any rough spots or imperfections on the surface of the bike. If you skip this step, you may find that the paint does not adhere well and that it chips or peels more easily over time.
How do I prepare my bike for painting without taking it apart?
To prepare your bike for painting without taking it apart, you will need to clean it thoroughly and remove any rust or other debris from the surface. You can use a degreaser or WD-40 to remove any dirt or grime and a rust remover to get rid of any rust. Once the bike is clean and dry, you can use painter’s tape or aluminum foil to cover any parts that you do not want to paint. Finally, you can apply a high-quality primer and paint to the surface of the bike.
What type of paint should I use for painting my bike without taking it apart?
When painting a bike without taking it apart, it is important to use a high-quality paint that is designed for use on metal surfaces. You can use either spray paint or brush-on paint, depending on your preference. Look for a paint that is durable and long-lasting and that comes in a color that you like. You may also want to consider using a clear coat to protect the paint and give it a glossy finish.
What are some common mistakes to avoid when painting a bike without disassembling it?
When painting a bike without disassembling it, there are a few common mistakes that you should try to avoid. First, do not rush the process. Take your time and apply thin coats of paint, allowing each coat to dry completely before applying the next. Second, do not apply too much paint at once, as this can cause drips and runs. Third, make sure to thoroughly clean and sand the surface of the bike before you begin painting. Finally, be sure to use a high-quality paint and primer to ensure that the paint job lasts as long as possible.